
Stargazing is a captivating hobby that connects us with the vastness of the universe. Whether you’re a complete beginner or looking to refine your skills, this guide will help you navigate the night sky like a pro.
Getting Started: Your First Steps into the Cosmos
The best way to start stargazing is simply to step outside and look up. Begin by familiarizing yourself with the night sky using just your eyes. Identify bright stars, planets, and constellations visible from your location. This initial exploration helps you develop a sense of the sky’s layout and movement.
For beginners, it’s helpful to start with easily recognizable celestial objects. The Moon is an excellent first target, offering fascinating details even to the naked eye. Bright planets like Venus, Jupiter, and Mars are also great for novice stargazers.
Essential Tools for the Aspiring Astronomer

While stargazing can be enjoyed with the naked eye, certain tools can significantly enhance your experience:
- Binoculars: A great starting point before investing in a telescope. They’re portable, easy to use, and can reveal stunning details of the Moon, star clusters, and even some galaxies.
- Telescope: The quintessential tool for serious stargazers. Telescopes come in various types and sizes, each with its strengths. For beginners, a simple 6-inch Dobsonian reflector offers a good balance of aperture and ease of use.
- Star Charts or Astronomy Apps: These are invaluable for navigating the night sky. Popular apps like Stellarium, SkySafari, or NASA’s Sky Map turn your smartphone into a portable planetarium.
- Red Flashlight: Essential for preserving your night vision while reading star charts or adjusting equipment.
- Comfortable Seating: A reclining chair or blanket can make long observation sessions more enjoyable.
Techniques to Enhance Your Stargazing Experience
Adapting Your Eyes for Optimal Viewing
One of the most crucial aspects of successful stargazing is allowing your eyes to adapt to the darkness. This process, known as dark adaptation, typically takes about 30 minutes. During this time, avoid looking at bright lights or screens.
To see more stars, use a technique called averted vision. Instead of looking directly at a faint object, focus slightly to the side of it. This takes advantage of the rod cells in your eyes, which are more sensitive to low light levels.
Choosing the Right Time and Place
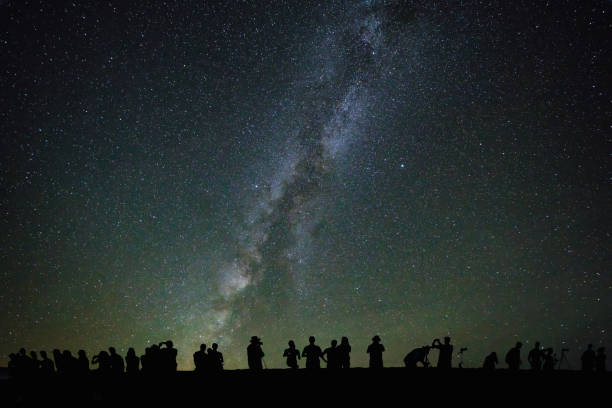
The best time for stargazing is during a new moon when the sky is darkest. However, each season offers unique celestial sights. Summer nights showcase the Milky Way, while winter skies reveal brilliant stars like Orion and Sirius.
Finding a dark sky location away from city lights will dramatically improve your stargazing experience. Check for local dark sky parks or rural areas for the best viewing conditions.
Capturing the Night Sky: Astrophotography Basics

Many stargazers find that astrophotography adds an exciting dimension to their hobby, allowing them to capture and share the wonders they observe. From stunning Milky Way landscapes to detailed images of distant galaxies, astrophotography opens up a world of possibilities. Let’s explore the basics of this captivating pursuit.
Getting Started with Astrophotography
- Choose Your Subject: Astrophotography encompasses various subjects, including:
- Nighttime landscapes with stars
- The Milky Way
- Moon phases and lunar eclipses
- Planets and planetary alignments
- Deep-sky objects (galaxies, nebulae, star clusters)
- Essential Equipment:
- A camera with manual settings (DSLR or mirrorless)
- A sturdy tripod
- Wide-angle lens for landscapes and Milky Way (14-24mm is ideal)
- Intervalometer or remote shutter release
- Camera Settings for Night Sky Photography:
- Use manual mode for full control
- Set your lens to its widest aperture (lowest f-number)
- Choose a high ISO setting (1600-6400, depending on your camera’s capabilities)
- Use long exposure times (15-30 seconds for stationary shots, or longer with a star tracker)
- Shoot in RAW format for maximum editing flexibility
- Focusing Techniques:
- Switch to manual focus
- Use your camera’s live view function, zoomed in on a bright star
- Adjust focus until the star appears as a sharp point of light
- Some lenses work well when set to infinity, but always check
- Composition Tips:
- Include interesting foreground elements for landscape astrophotography
- Use the rule of thirds to place the Milky Way or other celestial objects
- Consider light painting techniques to illuminate foreground elements
Advanced Astrophotography Techniques
- Star Trails:
- Use very long exposures (30 minutes to several hours) or stack multiple shorter exposures
- Keep ISO lower (400-800) to reduce noise
- Use an intervalometer to automate the process
- Deep-Sky Astrophotography:
- Requires a telescope or long telephoto lens
- Use a star tracker or equatorial mount to compensate for Earth’s rotation
- Take multiple long exposures (1-5 minutes each) and stack them in post-processing
- Planetary Imaging:
- Use a telescope with a high focal length
- Employ a technique called “lucky imaging” – taking many short exposures and stacking the best ones
Post-Processing Your Astrophotos

Post-processing is a crucial step in astrophotography. It allows you to bring out details, reduce noise, and enhance the colors in your images. Some key steps include:
- Stacking multiple exposures to reduce noise
- Adjusting white balance to achieve natural-looking star colors
- Carefully increasing contrast and saturation to bring out faint details
- Noise reduction techniques specific to astrophotography
Choosing Advanced Equipment
As you progress in astrophotography, you might consider specialized equipment:
- Star Trackers: Portable mounts that compensate for Earth’s rotation, allowing longer exposures of the night sky.
- Telescopes: For detailed images of planets, galaxies, and nebulae. Popular types include refractors, reflectors, and Schmidt-Cassegrains.
- Dedicated Astronomy Cameras: Offer better sensitivity and cooling than standard DSLRs, ideal for deep-sky imaging.
- Filters: Light pollution filters can help combat urban skyglow, while narrowband filters isolate specific wavelengths of light emitted by nebulae.
Tips for Success
- Plan Your Shoots: Use apps to check moon phases, Milky Way position, and weather conditions.
- Practice Makes Perfect: Astrophotography requires patience and persistence. Don’t get discouraged if your first attempts aren’t perfect.
- Join a Community: Connect with other astrophotographers online or through local astronomy clubs to share tips and inspiration.
- Respect the Environment: When shooting in nature, follow Leave No Trace principles and be mindful of wildlife.
- Keep Learning: Astrophotography is a field of constant innovation. Stay updated with new techniques and technologies.
Remember, astrophotography is as much about the journey as it is about the final images. Each session under the stars is an opportunity to learn, improve, and marvel at the wonders of the cosmos. Whether you’re capturing wide-field views of the Milky Way or intricate details of distant nebulae, astrophotography allows you to share the beauty of the night sky with others and create lasting memories of your celestial adventures.
Deepening Your Cosmic Connection
Joining the Stargazing Community
Connecting with fellow astronomy enthusiasts can greatly enrich your stargazing experience. Look for local astronomy clubs or online communities where you can share observations, learn new techniques, and participate in star parties.
Continuous Learning and Exploration
The field of astronomy is ever-evolving, with new discoveries constantly reshaping our understanding of the universe. Stay curious and keep learning:
- Follow astronomy news and publications.
- Attend lectures or webinars by professional astronomers.
- Set personal goals, like observing all Messier objects or tracking planetary movements.
Leveraging Technology: Stargazing Apps
In the digital age, your smartphone can become a powerful tool for exploring the night sky. Stargazing apps combine GPS technology with comprehensive astronomical databases to create a real-time, interactive guide to the cosmos. Here’s how these apps can enhance your stargazing experience:
Benefits of Stargazing Apps
- Real-time Sky Maps: Most apps use your device’s sensors to show you an accurate representation of the sky from your location, making it easy to identify stars, planets, and constellations.
- Object Information: Tap on any celestial object to get detailed information about its characteristics, mythology, and scientific importance.
- Night Mode: Many apps offer a red-light mode to help preserve your night vision while using the app outdoors.
- Augmented Reality: Some apps use your device’s camera to overlay celestial information on the real sky, creating an immersive learning experience.
- Notifications: Stay informed about upcoming celestial events, ISS passes, and optimal viewing conditions.
Popular Stargazing Apps
Here are some widely-used and highly-rated stargazing apps:
- Stellarium Mobile: A mobile version of the popular desktop planetarium software. It offers a realistic sky map and a vast database of celestial objects.
- SkySafari: Available in different versions (basic to professional), this app provides detailed sky simulations and can even control computerized telescopes.
- Star Walk 2: Known for its beautiful graphics and user-friendly interface, this app is great for beginners and includes a time machine feature to view the sky at different dates and times.
- NASA App: While not strictly a stargazing app, it provides a wealth of space-related information, including live streams from the ISS and updates on NASA missions.
- Night Sky: Offers augmented reality features that let you identify objects by pointing your device at the sky. It also includes a community feature for sharing observations.
- Cosmic Watch: Unique in its approach, this app visualizes Earth’s relationship to celestial bodies, making it excellent for understanding celestial mechanics.
Using Apps Effectively for Stargazing
While apps are powerful tools, it’s important to use them judiciously during your stargazing sessions:
- Preserve Night Vision: Use the app’s night mode or red light filter, and keep screen brightness to a minimum.
- Pre-planning: Use the app indoors to plan your session, identifying key objects you want to observe.
- Enhance, Don’t Replace: Use the app to supplement your naked-eye observations, not to replace them. The goal is to learn the sky, not just to rely on technology.
- Offline Use: Download offline sky maps when available, as many prime stargazing locations may have limited internet connectivity.
- Regular Updates: Keep your app updated to ensure you have the most current information on celestial events and newly discovered objects.
By integrating these digital tools with traditional stargazing methods, you can create a rich, informative, and enjoyable astronomical experience. Whether you’re a casual observer or an aspiring astrophysicist, stargazing apps can open up new dimensions in your exploration of the night sky.
From Casual Observer to Astronomy Aficionado

As you delve deeper into stargazing, you might find yourself becoming what’s often called an “astronomer” or “skygazer.” These terms describe individuals with a passionate interest in observing and studying celestial objects.
Remember, becoming proficient in stargazing takes time and patience. Each night under the stars is an opportunity to learn and discover something new. Whether you’re identifying constellations, tracking the phases of the Moon, or searching for elusive deep-sky objects, approach each session with curiosity and wonder.
By following these tips and techniques, you’ll be well on your way to stargazing like a pro. So grab your gear, find a dark spot, and prepare to be amazed by the wonders of the cosmos. The universe is waiting for you to explore it!